The following rights must be assigned to a user to manage and view complaint exceptions:
Rights |
Description |
|
CMP_CREATE |
Allows user to create new Complaint Exceptions.
|
|
CMP_DELETE |
Allows user to delete Complaint Exceptions.
|
|
CMP_MANAGE |
Allows user to manage Complaint Exceptions that the user owns.
|
|
CMP_SUPERVISOR |
Allows user to manage Complaint Exceptions that any user owns.
|
|
CMP_VIEW |
Allows user to view Complaint Exceptions.
|
|
NOTE: users must also be given rights to view setup data (i.e., Departments, Clients, Parts) for any fields needed to zoom from when creating and editing exceptions. |
Please see the Admin Guide for more information on assigning Rights to Users
· Complaint exceptions created under the global organization can be viewed and managed from the global organization and any local organization by users who have appropriate rights.
· Complaint exceptions created within a local organization can only be viewed and managed from that local organization by users who have appropriate rights.
1. From the SmartSolve© Home tab select Complaint from Open.
2. Enter all required data. See the tables below for information about data to be entered in the fields.
3. Click the Save button to submit.
|
NOTES: Similar complaint exceptions can be linked through the References folder of the exception record. When creating new complaint exceptions the end user can also use the Save and Add Related buttons to link complaint exceptions. Please see How to Attach Exception References. To add additional user defined fields to the complaint exception template (free text, date, zoom fields) please see Forms Designer. |
The following fields are available in the off-the-shelf complaint exception template for SmartComplaintsTM:
|
NOTE: an asterisk (*) denotes a required field. |
Fields |
Description |
|
*Client |
Enter the person reporting the complaint. (Client | Department | Work Center). Clients can be configured during system set-up.
|
|
Contact Code |
Fill Contacts: Click this button and any contacts listed in the Client field (internal or external) auto populate into the Contact Code drop down menu where they can be selected. Or zoom to enter any contacts not listed in the menu. Fill Address: click this button and any address information included in the selected client record auto populates contact specific information such as email, phone, etc. into all address fields.
|
|
*Contact Type |
Click the drop down arrow to select from a pre-defined list of contact types: None, Customer, Sales Rep, and End User. Additional types can be configured during system setup.
|
|
*Report Date |
Enter the date the complaint exception was reported. This defaults to the current date.
|
|
*Occurrence Date |
Enter the date the actual incident/problem/event occurred (at the site of origination). This defaults to the current date.
|
|
|
NOTE: Report Date must be greater than Occurrence Date.
|
|
*Reporter |
Zoom to select the internal actor or client entering the complaint. This defaults to the record creator.
|
|
*Incident Aware Date |
Enter the date your organization became aware of the incident/problem/event. This defaults to the current date.
|
|
Country of Origin |
The country where the event occurred, which can be used in your analysis of what country regulatory reports may be affected.
|
|
Originating Site |
The organization that takes the call. If you have a call center that is defined geographically you can define the call center that received the call. This allows you to run metrics by call center.
|
|
Template Fields – Product Information |
|
|
Brand Name |
Enter the brand name of the product which the complaint is against (if applicable).
|
|
Catalog Number |
Enter the catalog number of the product which the Complaint is against (if applicable).
|
|
*Part Number |
Enter the product number against which the complaint is being recorded (product that failed). Products can be configured during system set-up.
|
|
Product Type |
This differentiates the type of product defined in the event. For example, combination device or medical device. You can drill down and create another level if your company needs to differentiate your products. This field can be used in your regulatory reporting policy as a differentiator for which plant registration number to use for your MedWatch reporting.
|
|
*Organization Unit |
Zoom to select a source of the failure or development/investigation unit (may also later be determined during Root Cause Analysis). Organization Unit may be Client, Department, or Work Center. Organization Units can be configured during system set-up.
|
|
Lot Number |
Enter the lot number associated with the Product (if applicable). Serialized: identify if the product is serialized (serial numbers can be recorded later in the complaint after it has been saved).
|
|
*Qty. Affected/Unit |
Enter the number of products affected by the complaint.
|
|
Manufactured Date |
Enter the date the product was manufactured (if applicable).
|
|
Expiration Date |
Enter the date the product is due to expire or has expired (if applicable).
|
|
Template Fields – Problem Information |
|
|
*Short Description |
The effect of the failure is documented in this field. The data fields are selected from the Product Failure Mode table and can be filtered based on the Exception Type to show only effects of the failures for the complaint recorder.
|
|
*Description |
Enter a summary of the complaint description.
|
|
*Injury | Death? |
Select an impact for the complaint. Yes or No
|
|
*Category |
Select a category from the drop down list. This is the category of the failure mode selected. This field auto populates when the failure mode is entered in the Short Description field and helps group common failures by category for future pareto analysis reporting. Categories can be configured during system set-up.
|
|
Cost |
Enter the cost of the failure mode selected. This field auto populates when the failure mode is entered in the Short Description field and helps future pareto analysis reporting of your complaints. Costs can be configured during system set-up.
|
|
*Severity |
Select a severity for the failure mode selected from the drop down list. This field auto populates when the failure mode is entered in the Short Description field. Severity can be configured during system set-up.
|
|
*Priority |
Select a priority for the complaint from the drop down menu. This field is used by the complaint owner to prioritize the complaint for handling. Priority can be configured during system set-up.
|
|
External Reference |
Any reference outside of the SmartComplaintsTM system (i.e., CRM report #, another country submits an Adverse Event Report to you from a customer, etc.).
|
|
Cause |
Zoom to select the possible cause of the failure (Product Failure Mode).
|
|
Cause Category |
Select a category for the cause selected from the drop down list. This field auto populates when the cause is entered and helps group common causes by category for future pareto analysis reporting. Categories can be configured during system set-up.
|
|
Returns Information Template Fields – Additional Information |
|
|
Is Sample Available? |
Select Yes if a sample of the failed product is included. Select No if a sample of the failed product is not included.
|
|
Sample Quantity |
If a sample is included, enter the number of samples.
|
|
Sample Location |
Enter where the samples can be located. Additional Types can be configured during system set-up.
|
|
Return Sample to Customer? |
Enter Yes if a sample is to be returned to the customer. Enter No is a sample is not to be returned to the customer.
|
|
Sample Decontaminated? |
Enter Yes if the sample is decontaminated. Enter No if the sample is not decontaminated.
|
|
Tracking No. |
If the sample was returned to the customer, enter the tracking number.
|
|
Forwarded To |
If the sample was forwarded, enter where the sample was forwarded.
|
|
Sample Receipt Date |
Enter the date the sample was received by the customer.
|
|
*Requested Action |
From the pre-defined list of requested actions, select the action requested by the customer. Requested Actions: None, Credit, Replacement, and Repair. Additional Actions can be configured during system set-up.
|
|
RGA Number |
Enter the Returned Goods Authorization given to the customer authorizing the return.
|
|
Other fields |
All other fields are optional and contain more returned goods information as needed.
|
The following options are available within complaint exception records and can be managed accordingly by a user with appropriate rights:
· Exceptions can be edited and deleted from the system
· Exception ownership can be changed at anytime if needed
· Attachments can be attached to Exceptions
· Activities can be recorded in Exceptions
· Exceptions can be referenced (attached) to one another
· Exceptions can be referenced to 3rd party or other SmartSolve© records
· Exceptions can be attached to issue records or issues created from exceptions
The Complaint Detail is always the first information displayed when entering the complaint exception record. The following information is available:
Information |
Description |
|
Header
|
The Header of the complaint exception record is always displayed at the top of the screen and contains the following information: · Exception Number – Unique number assigned to the Exception record and can be based on the exception type (this cannot be changed once the Exception is Created). · Status – The current status of the complaint exception (OPEN, INWORKS, CLOSED, etc.). · Category – All complaint exceptions can be configured to be categorized automatically by the system based on Exception Type Failure Modes selected by the user. Please see SmartCAPATM Setup. · Occurrence Date – This is the date that the complaint occurred. · Severity & Priority – Severity and priority attached to this complaint exception. · Short Description – This is usually referred to as the Title of the Exception (Problem Description, Complaint Code, Failure Mode, etc.).
|
|
Ownership |
Each complaint exception record contains an owner who is responsible for overseeing the activities within the complaint exception record (i.e., running the Decision Tree, performing or managing the Action Plan Investigations, etc.). Exception ownership can be changed at anytime.
|
|
Resolution |
The Resolution Section of the complaint exception displays Root Cause and Investigation Results as they transferred to the complaint exception from an issue (if an Issue was attached). This information can also be manually entered into the complaint exception record by the owner if no issue has been created or attached to the complaint exception.
|
Complaint exceptions are also managed by status. The following complaint exception statuses are used in the system:
Status |
Description |
|
OPEN |
The OPEN Status places the newly created complaint exception under the exception owner’s Things To Do List: Items Need Attention – Exception.
|
|
INWORKS |
When complaint exceptions are owned, the INWORKS Status is displayed. INWORKS complaint exceptions display under the Things To Do List: Items Under My Ownership – Exception.
|
|
ATTACHED |
If an issue is created from the complaint exception, or the complaint exception is attached to an existing issue, the ATTACHED displays.
|
|
CLOSED |
The complaint exception owner can manually close the complaint exception by assigning a resolution. Once closed, the complaint exception status displays as CLOSED. If the complaint exception has been attached to an issue, the issue record will later close the complaint exception.
|
1. From the SmartSolve© Search tab select Exception > Complaint.
The Complaints list displays.
2. Click the ![]() icon to switch to Local view (if applicable).
icon to switch to Local view (if applicable).
3. Select the check box of the Complaint Exception to edit, then select Action > Edit from the main menu (or right click).
4. Edit any information for your complaint exception.
5. Click the Save button.
All changes should now be reflected in the list.
|
NOTE: if certain fields should not be edited by the user, these fields can be disabled. Please see Forms Designer. |
Exceptions can only be deleted by users with appropriate rights. Typically, complaint exceptions should not be deleted from the system.
1. From the SmartSolve© Search tab select Exception > Complaint.
The Complaints list displays.
2. Click the ![]() icon to switch to Local view (if applicable).
icon to switch to Local view (if applicable).
3. Select the check box of the complaint exception to delete, then select Action > Delete from the main menu (or right click).
4. Click the Save button.
The complaint exception has now been removed from the system.
When a complaint exception is owned, it is moved from the Items Need Attention – Exception list down to Items Under My Ownership – Exception. This functionality is typically only used if multiple users are responsible for owning complaint exceptions and is an optional feature.
1. From the SmartSolve© Home tab, select Items Need Attention > Exception.
The Open Exceptions list displays.
2. Select the Exception No. to enter the exception record
3. Select Action > Own from the main menu (or right click).
4. Click the Ok button to confirm ownership.
The Exception Status now displays INWORKS and the Exception can be accessed under Items Under My Ownership – Exception on the Things To Do List.
When a complaint exception is disowned, it is moved from the Items Under My Ownership – Exception Things to Do List back up to Items Need Attention – Exception. This functionality is typically only used if multiple users are responsible for owning complaint exceptions to take care of updates.
1. From the SmartSolve© Home tab select Items Under My Ownership > Exception.
The Open Exception list displays.
2. Select the Exception No. to enter the Exception record.
3. Select Action > Disown from the main menu (or right click).
4. Enter a Comment and Password.
5. Click the Save button.
The Exception Status now displays OPEN and the Exception can now be accessed under Items Need Attention – Exception on the Things To Do List.
1. From the SmartSolve© Search tab select Exception > Complaint.
The Complaint list displays.
2. Select the Exception No. to enter the complaint exception record.
3. Select Action > Change Owner from the main menu (or right click).
4. Zoom from the Exception Owner field and select the new Owner.
Only users with the role assigned can be applied as the owner.
5. Enter a Comment and Password.
6. Select the Save button.
The complaint exception owner has now been changed.
1. From the Exception select the Attachment tab.
2. Select Action > Add from the main menu (or right click).
3. Enter the Description of the attachment.
4. Select the Browse button and locate and select the file to attach to the complaint exception.
5. Select the Save button.
The file is now attached to the complaint exception.
The pushpin icon ![]() appears in the complaint exception record's detail window to signal that a file is attached to the record.
appears in the complaint exception record's detail window to signal that a file is attached to the record.
An attachment's content cannot be edited from the record to which it is attached. Content must be edited from the file's location in the external directory, deleted from the Attachment folder and re-attached to the record.
|
NOTE: The procedure to view an attachment is dependent on the browser. |
Not all information may be available at the time the complaint exception is created. When more information is gathered or additional actions performed in evaluating or processing the complaint exception, SmartComplaints provides the ability to track activities such as customer/supplier communication, meetings, etc.
1. From the complaint exception select the Activity tab.
2. Select Action > Add from the main menu (or right click).
3. Select the Activity Type from the drop down menu.
Please see Exception Activity Types
4. Enter information in the following fields:
Field |
Description |
|
Activity Type |
Select an activity type from the drop down menu.
|
|
Performed Date |
Enter the date the activity was carried out (if in the past).
|
|
Performed By |
Enter the name of the person who performed the activity (if other than you).
|
|
Comment |
Enter a comment for the activity.
|
|
Confirm password |
Enter your password.
|
|
Add Another |
Click the check box to add another activity.
|
5. Click the Save button.
The Activity is now added to the complaint exception.
The following system generated activities are tracked in the complaint exception record for future reference:
Activity Type |
Description |
|
Change Owner |
Anytime ownership is changed in the complaint exception, the activity is tracked.
|
|
Own |
Anytime a complaint exception is owned by a user, the activity is tracked.
|
|
Disown |
Anytime a complaint exception is disowned by a user, the activity is tracked.
|
|
Attach To Issue |
Anytime a new issue is created from the complaint exception, or the complaint exception is attached to an issue, the activity is tracked.
|
|
Close |
Anytime a complaint exception is closed by a user, the activity is tracked.
|
|
Reopen |
Anytime a complaint exception is reopened by a user, the activity is tracked.
|
There may be times when controlled records (documents, third party, or other quality system records) need to be attached to the complaint exception. This folder contains a reference to all such records. This information can also be entered in the complaint exception creation screen by the reporter.
Reference Type |
Description |
|
Document No. |
This field actually links to SmartDocTM Documents, SmartAuditTM Criteria, SmartTrainTM Courses, and other SmartSolve© Records such as Document Change Requests, Issues, etc.
|
|
External Reference |
This field could be setup by your system administrator. Please see External Data Sources.
|
|
Related Exceptions |
Attach as many complaint exceptions as needed to one another for future reference. Complaint exception creators can also attach complaint exceptions to one another while creating complaint exceptions in the system by selecting the Save and Add Related button in each Exception Create window.
|
1. From the Exception select the Reference tab.
2. Select Action > Edit from the main menu (or right click).
3. Click the Add button for the Reference Type you wish to add to the complaint exception and add the reference.
4. Click the Save button at the bottom of the Reference window.
The Reference is added to the complaint exception.
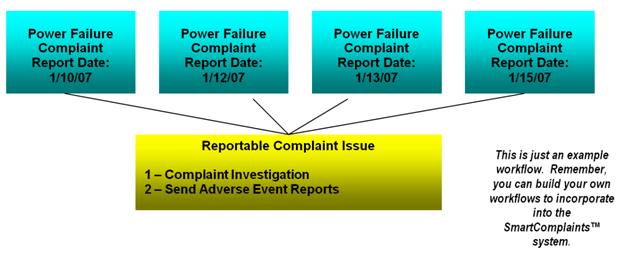
A complaint exception can be attached to an existing issue (similar or same product/process failure) and will later be closed by the issue record or a predefined task. The complaint exception owner can search for issues that have the same types of complaint exceptions and are currently under resolution in another issue. The complaint exception owner determines which phase the issue is under to determine if the complaint exception can be attached, or if a new issue needs to be created.
If you find a trend, where the same problem occurs against your products or operations, you can attach multiple complaint exceptions to one existing issue record for resolution. This saves resource cost and time when resolving internal/external issues.
1. From the Exception select the Issue tab or the Detail tab.
2. Select Action > Attach To Issue from the main menu (or right click).
3. Zoom from the Document No. field and select the Issue which will be attached to the complaint exception.
4. Click the Save button.
The Issue has now been attached to the complaint exception.
Please see Active and Passive References for more information on how Issue records can later close complaint exceptions.
Please see How to Remove Exceptions from Issues.
As long as the complaint exception has not been attached to an issue, the complaint exception can be manually closed by a user with appropriate rights.
1. From the Exception select the Detail tab.
2. Select Action > Close from the main menu (or right click).
3. Enter Resolution.
Please see How to Create Exception Resolutions
4. Enter Password.
5. Click the Save button.
The complaint exception status now displays as CLOSED.
Please see How to Reopen Exceptions
Complaint exceptions can only be reopened by users with complaint exception supervisor rights.
1. From the complaint exception select the Detail tab.
2. Select Action > Reopen from the main menu (or right click).
3. Click the Ok button to confirm the reopen process.
4. Enter a Comment.
5. Enter Password.
6. Click the Save button.
The complaint exception status now displays as OPEN if the exception is not attached to an issue or ATTACHED if the exception is attached to an issue.